
Making Starlink actually work for use on the road
Previously: Is Starlink worth it?
Starlink setup and teardown at each location limit where and when you can use it, and running an inverter to keep it running sucks a lot of power. Both these can be fixed by:
- Flat-mounting the dish, instead of pole-mounting it
- Rewiring it for 48 volt PoE injection (displacing the Starlink router, which does that)
Contents
YouTube University
Background and stories about it all.
Official flat-mount
Starlink’s official flat-mount dish is larger and requires more power than the normal dish, and it costs a whopping $2,500.
https://www.youtube.com/watch?v=lgxlWl244nY
Rednecking the flat-mount
If you don’t want to spend $1,500, but do have a square dish, try taking it apart.
https://www.youtube.com/watch?v=ZRI8AB0AfR8
3d-printed mount
If you’ve watched all those and want to try a cleaner and more sophisticated DIY approach…
https://www.youtube.com/watch?v=gRSnTMrUPrQ
Also peep the PoE mod in that video.
12 volt mod
And here’s another 12 volt mod/PoE example.
https://www.youtube.com/watch?v=vrGCL9pNDDc
Wiring
The cable to the Starlink dish is ethernet with weird ends and weird pair order.
Spacex Starlink swapped RJ45 wiring
- Orange stripe
- Orange
- Blue stripe
- Green
- Green stripe
- Blue
- Brown stripe
- Brown
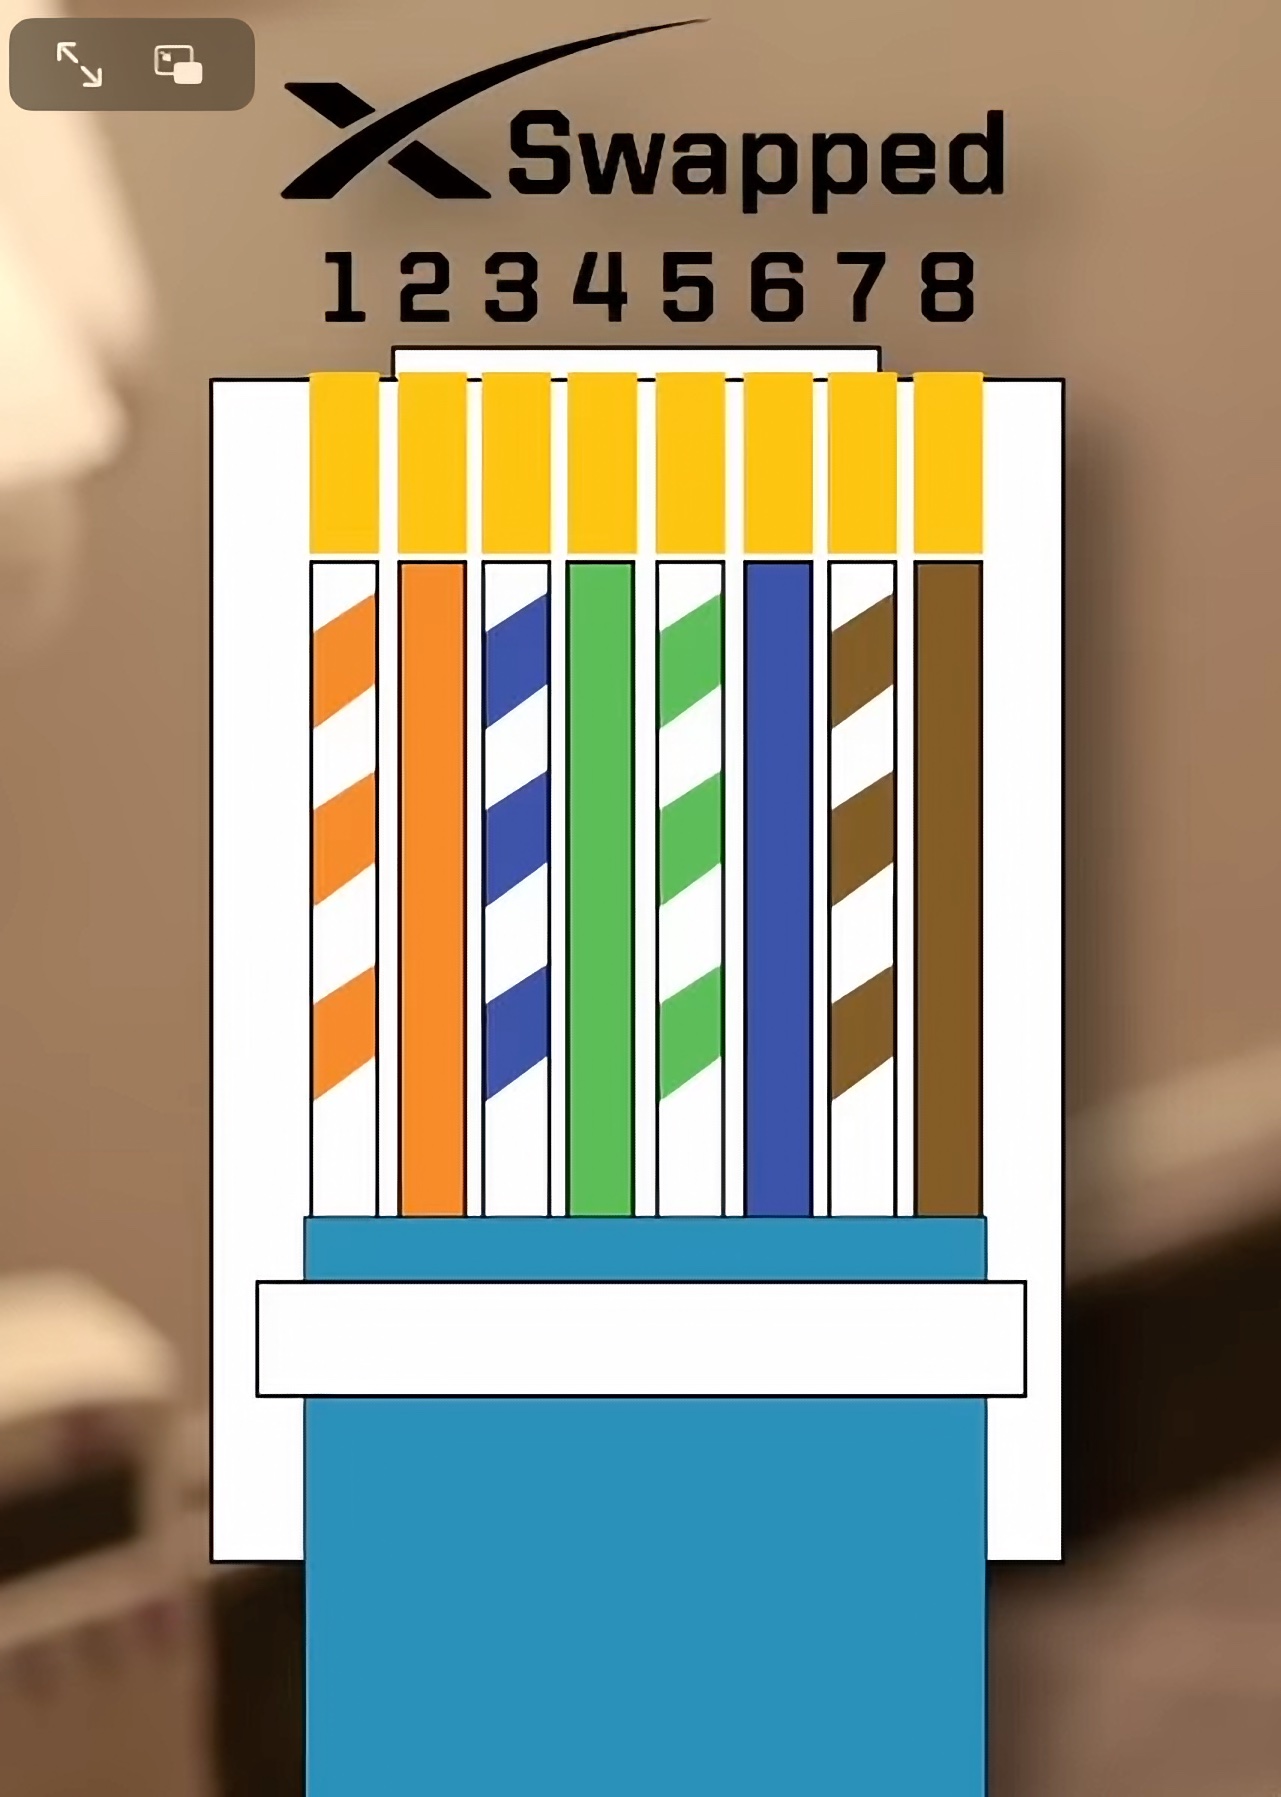
The swapped wire order in the Spacex Starlink dishy cable. From the Everlanders video linked above.
T586B “normal” RJ45 wiring
- Orange stripe
- Orange
- Green stripe
- Blue
- Blue stripe
- Green
- Brown stripe
- Brown
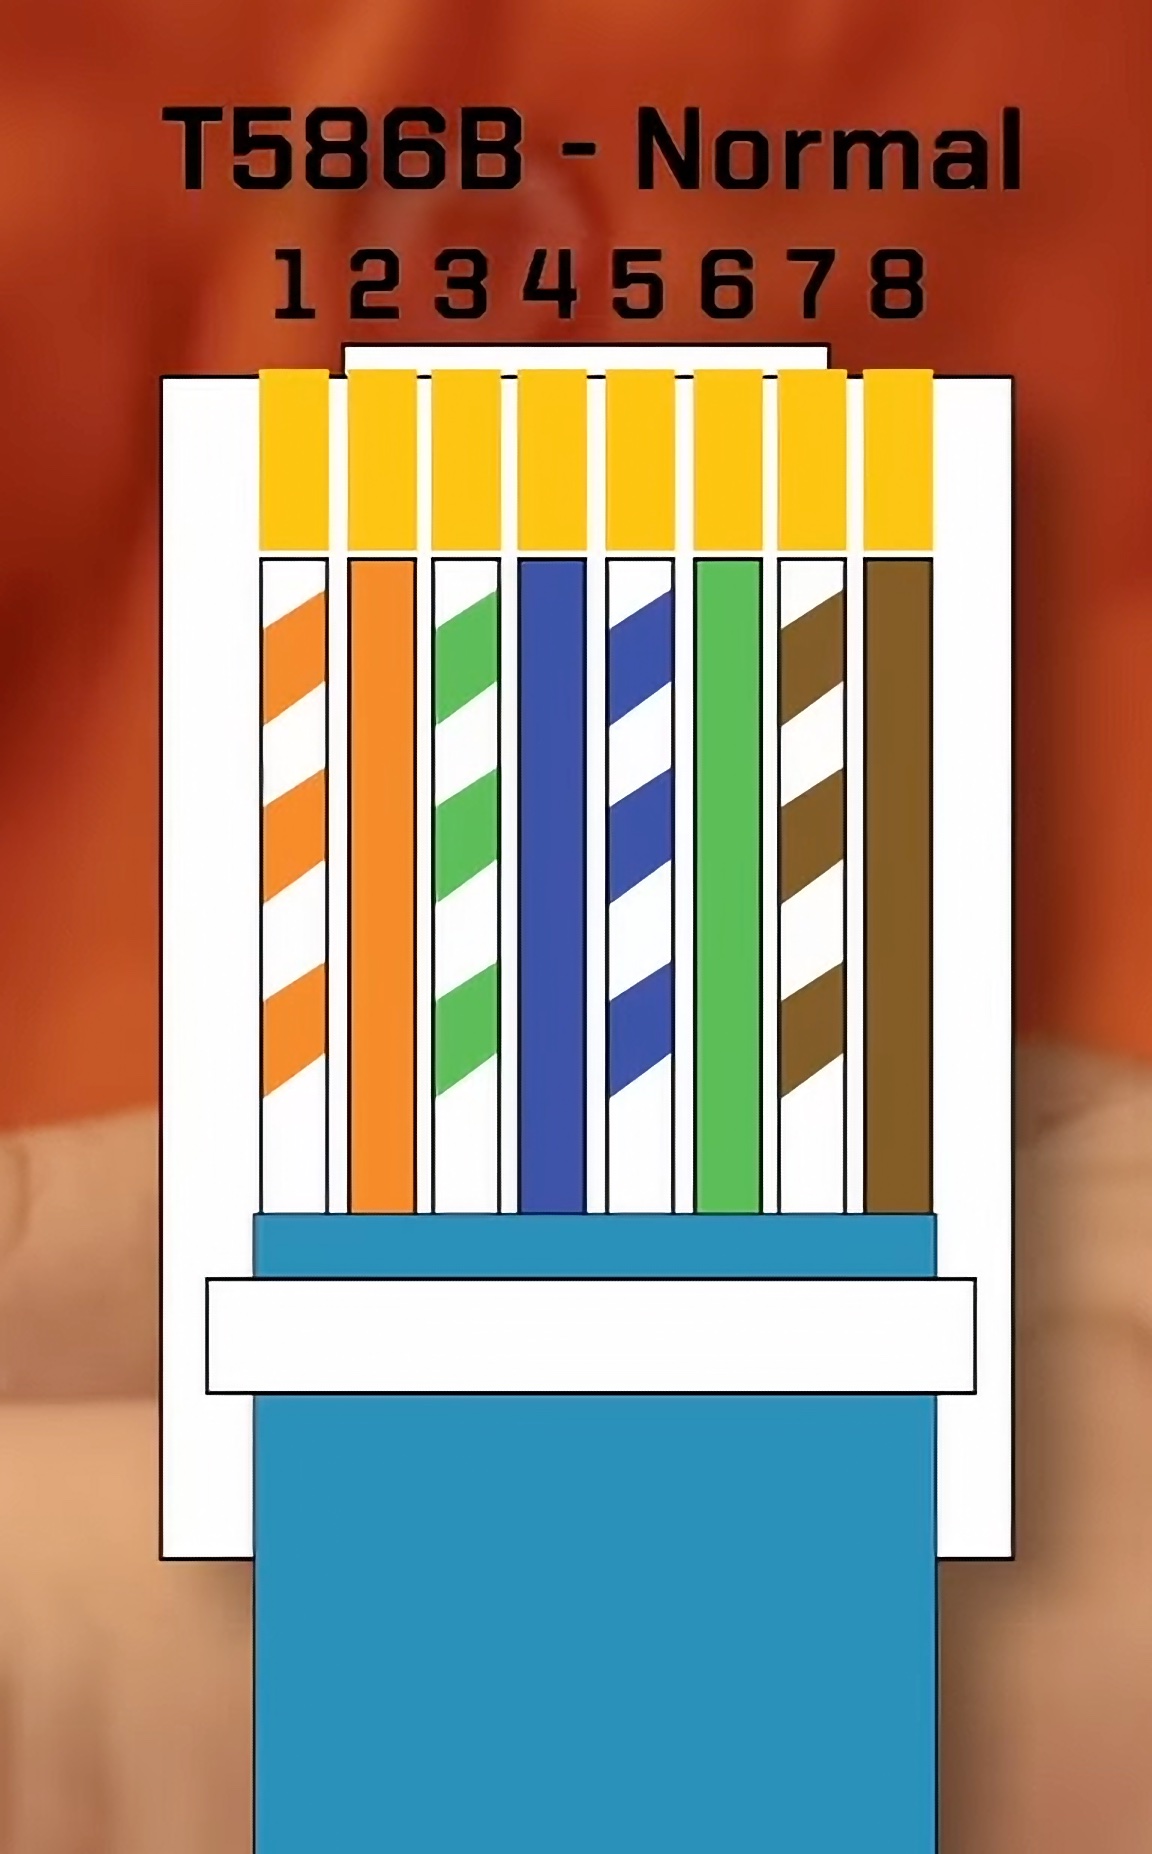
The “normal” ethernet wire order. From the Everlanders video linked above.
Wiring it together
The ideal setup as shown in the Everlanders video linked above is to connect the Dishy to the PoE injector, and then connect that to your own router (eliminating the Starlink router entirely).
That requires two cables:
- Dishy to PoE injector
- One end is the Dishy proprietary connector
- The other end is the RJ45 Spacex Starlink swapped connector you’ll have to crimp on
- PoE injector to your own router 3. One end is the RJ45 Spacex Starlink swapped connector you’ll have to crimp on 4. The other end is a regular T586B “normal” RJ45 connector (you can crimp this on yourself, or cannibalize a regular cable that already has this connector)
If you ever need to use the official Starlink router again (say, if you need to connect to Dishy through the app), then it requires the following cabling:
- Dishy to RJ45 coupler
- One end is the Dishy proprietary connector
- The other end is the RJ45 Spacex Starlink swapped connector you crimped on above
- RJ45 coupler to the official Starlink router
- One one end you’ll have a RJ45 Spacex Starlink swapped connector like you did for the cable connecting to the dishy
- The other end is the proprietary connector that plugs into the Starlink router
Be sure to label everything. Nearly any label works if you secure it to the wire with clear heat shrink
Parts
- PoE injector
- 12 to 48 volt boost transformer
- Shielded RJ45 crimp connectors with boots (fit for the heavier insulation on the Starlink cable)
- RJ45 couplers
- Clear heat shrink tubing (to seal your wire labels in place)
Tools
Update
Everlanders’ with an update to how their Starlink has been working, and an alternative DC power supply.